
All About Home Generators
What Happens to Your Pets During a Power Outage?
Why Ontario homeowners with dogs, cats, aquariums, or small animals should think about automatic backup power Most people think about power outages in terms of
The #1 Authorized Generac Home Standby Generator Dealer in Ontario
When most homeowners start thinking about a home standby generator, they usually focus on the generator itself. They ask about the size, the brand, the price, the noise level, the fuel type, and whether it can power the whole house during an outage. Those are all good questions. But after years of seeing installations in real homes across Ontario, I can tell you this: the generator is only one part of the job.
A proper home standby generator installation is a system. It includes the generator, the automatic transfer switch, the electrical connection, the gas or propane supply, the concrete or composite pad, clearances, permits, inspection, testing, and homeowner handover. When all of those pieces are done properly, the generator feels effortless. The power goes out, the system senses the outage, the generator starts, the transfer switch moves the home to backup power, and the important parts of the house keep running.
When those pieces are rushed or poorly planned, the homeowner may end up with nuisance issues, overloaded circuits, gas supply problems, poor placement, failed inspections, or a generator that does not support the home the way they expected.
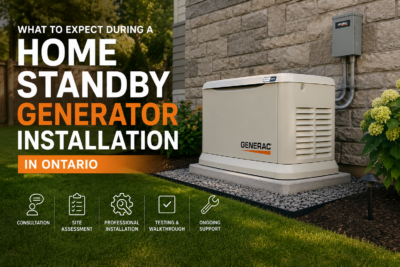
This article walks through what actually happens during a home standby generator installation in Ontario, from the first consultation to the final test. The goal is to explain the process in plain language, the way a technician would explain it on-site.
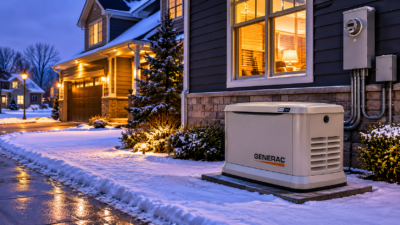
A Generac home standby generator is designed to sit outside your home and automatically provide backup power when the utility grid fails. Unlike a portable generator, a standby generator is permanently installed and connected to your home’s electrical system through an automatic transfer switch.
That automatic setup is what gives homeowners peace of mind. You do not have to drag a portable unit out of the garage. You do not have to run extension cords through a window. You do not have to be home when the outage happens. If the system is installed properly, it is ready whether the outage happens at 2 p.m. or 2 a.m.
But that convenience comes from proper planning.
A standby generator is not a plug-and-play appliance. It becomes part of your home’s electrical and fuel system. That means the installer has to look at the service size, panel layout, gas meter capacity, generator location, cable path, transfer switch location, grounding, clearances, local conditions, and the homeowner’s expectations.
Two houses can both need a 22 kW or 26 kW generator, but the installation can be completely different. One home may have the gas meter right beside the ideal generator location. Another may need a longer gas run, a meter upgrade, trenching, or a more complicated electrical route. One home may have enough wall space near the panel for a transfer switch. Another may have a finished basement, tight utility room, or older electrical layout that requires more careful planning.
That is why a proper site assessment is so important.
The installation process usually starts with a conversation. Before anyone starts talking about exact equipment or final pricing, the contractor needs to understand what the homeowner is trying to protect.
Some homeowners want essential backup power only. They care about the furnace, fridge, freezer, sump pump, well pump, a few lights, internet, and maybe some kitchen outlets. Other homeowners want whole-home backup, including air conditioning, larger appliances, and more convenience during long outages.
There is no single right answer. The right system depends on the home, the budget, and the homeowner’s comfort level.
A technician or consultant will usually ask questions such as:
What size is the home?
Is the home on natural gas or propane?
Is there a sump pump or well pump?
Is the heat electric, gas, propane, or oil?
Is there central air conditioning?
Are there medical devices or work-from-home needs?
Does the homeowner want the entire home backed up or just selected circuits?
Has the home had long outages before?
Are there future plans such as a hot tub, pool, EV charger, addition, or finished basement?
This part matters because generator sizing is not just about square footage. It is about load. A smaller home with electric heating or a large well pump may have a heavier electrical demand than a larger home with gas appliances. A home with two air conditioners may need load management even with a larger generator. A cottage or rural home may have different needs than a house in a subdivision.
The best generator quote is not the one that guesses. It is the one that understands the home.
The site assessment is where the installation starts to become real. This is when the contractor looks at the actual conditions and determines what can be done safely, legally, and efficiently.
For a home standby generator installation in Ontario, the site assessment usually includes three main areas: electrical, fuel, and physical placement.
On the electrical side, the contractor looks at the main service, the panel, available space, grounding, routing options, and the best location for the automatic transfer switch. They also consider whether the home has a 100 amp, 200 amp, or larger service, and whether the existing panel setup is straightforward or more complicated.
On the fuel side, the contractor looks at whether the home uses natural gas or propane. If it is natural gas, they need to consider the gas meter, existing appliances, pipe size, distance to the generator, and whether the meter has enough capacity. If it is propane, they need to look at tank size, regulator setup, supply distance, and whether the homeowner already has a propane supplier.
On the placement side, the contractor looks for a location that meets clearance requirements, keeps the generator serviceable, avoids exhaust issues, and works with the structure of the home. The generator needs room to breathe. It also needs room for a technician to open the lid and panels for maintenance and repair.
This is also where practical field experience matters. A location may look good to a homeowner but create problems later. For example, a generator tucked too tightly beside shrubs, under a window, near a dryer vent, in a snow drift area, or beside a narrow walkway may not be ideal. A good installer thinks about the generator not just on installation day, but five years later during a winter service call.
Once the home’s needs and site conditions are understood, the contractor can recommend the generator size and transfer switch setup.
For many Ontario homes, popular Generac air-cooled standby generator sizes fall in the residential range, such as 14 kW, 18 kW, 22 kW, 24 kW, and 26 kW, depending on the home and fuel type. The right choice depends on what the homeowner wants to run and how the loads are managed.
The transfer switch is just as important as the generator. This device is what safely separates the home from the utility grid and transfers selected loads, or the whole home, to generator power during an outage. Without a proper transfer switch, backup power can become dangerous for the home, the equipment, and utility workers.
There are different ways to configure a system.
A whole-home transfer switch is commonly used when the homeowner wants the generator connected to the main service. With the right generator and load management, this can provide a very comfortable outage experience.
A selected-circuit transfer switch may be used when only certain circuits need backup power. This can make sense for smaller systems or specific budgets, but it does not give the same whole-home convenience.
Load management can also be added when the generator cannot or should not run every large appliance at the same time. For example, air conditioning, electric ranges, dryers, and other high-demand loads may need to be controlled so the generator is not overloaded. A properly planned system does not simply turn everything on at once and hope for the best. It manages the home intelligently.
This is one of the biggest differences between a professional installation and a rough installation. A professional setup is designed around real-world use.
A good generator quote should be clear about what is included. Homeowners sometimes compare quotes only by the generator model, but the installation scope can be very different from one company to another.
A full home standby generator installation quote may include:
The generator
The automatic transfer switch
Electrical cable and wiring
Gas piping or propane connection allowance
Generator pad or base
Battery
Permits or inspection coordination
Startup and testing
Basic homeowner training
Warranty registration
Cleanup and disposal of packaging
Some quotes may include only a limited distance for cable or gas pipe, with extra charges beyond that. Some may include the battery, while others do not. Some include a standard pad, but not special stand, elevation, trenching, bollards, or landscaping work. Some include full coordination; others leave more responsibility with the homeowner.
This is why homeowners should not look only at the final number. They should look at what the number actually covers.
A lower quote that leaves out gas work, inspection, battery, transfer switch details, or extra site requirements may not be cheaper in the end. It may simply be less complete.
For Ontario homeowners, the cleanest experience is usually a turnkey generator installation where the electrical and fuel coordination is handled properly, the scope is clear, and the homeowner knows what to expect before the work begins.
A standby generator is permanent equipment. It connects to your home’s electrical system and uses natural gas or propane. That means this is not a DIY project.
In Ontario, electrical work for hire must be performed by a Licensed Electrical Contractor. The contractor is responsible for filing the proper electrical notification and arranging inspection where required. This protects the homeowner because the work is being done under the right licence and inspected through the proper process.
Fuel work also has to be handled by properly qualified gas professionals. Natural gas and propane are safe when installed correctly, but they must be treated with respect. Pipe sizing, pressure, regulators, clearances, shutoff valves, and testing all matter.
This is where homeowners should be careful. A generator installation is not just “putting a box outside.” It involves two serious systems: electricity and fuel. Both can be dangerous if handled incorrectly.
When a professional company installs a generator, the safety process usually includes:
Confirming the correct electrical equipment
Installing the automatic transfer switch correctly
Making sure the home is protected from backfeeding the grid
Sizing and testing the fuel connection
Maintaining required clearances
Following manufacturer instructions
Arranging inspection where required
Testing the generator under controlled conditions
Explaining safe operation to the homeowner
A clean installation should not feel mysterious. The homeowner should be able to ask what is being installed, where it is being installed, and how the system will be tested.
Before installation day, the homeowner may need to prepare the area. The contractor should explain this ahead of time.
In many cases, the homeowner should make sure the work areas are accessible. That may include the electrical panel, gas meter, utility room, side yard, basement route, garage, or exterior wall where equipment will be mounted. If the generator location is in a landscaped area, furniture, planters, hoses, or obstacles may need to be moved.
If there are pets, gates, locked areas, or alarm systems, those should be discussed in advance. If the home has a finished basement, drop ceiling, or tight mechanical room, the crew may need extra access or planning.
The homeowner should also expect a temporary power interruption during part of the electrical work. This is normal. The contractor should explain when it may happen and approximately what parts of the home will be affected.
For propane installations, the homeowner may also need to coordinate with a propane supplier if they do not already have one. The generator company may be able to recommend a supplier depending on the area, but the propane tank itself is often handled by a propane provider.
Good preparation makes the installation day smoother and helps avoid surprises.
On installation day, the crew starts by confirming the site conditions and equipment. The generator is placed in the approved location, usually on a pad, base, or prepared surface.
The base matters more than people think. A generator needs a stable, level surface. If it is sitting unevenly, sinking into soft ground, or placed where water and snow collect, that can create long-term issues. In Ontario, snow and freeze-thaw cycles are real concerns. A clean, stable installation helps protect the equipment and makes future service easier.
Depending on the site, the generator may sit on a manufacturer-approved composite pad, a concrete pad, or an elevated stand where appropriate. In areas with heavy snow buildup, uneven ground, or drainage concerns, elevation may be considered.
Once the generator is positioned, the crew can begin connecting the electrical and fuel systems. The exact order depends on the job, but the work usually includes mounting the transfer switch, running electrical wiring, making gas or propane connections, installing the battery, and preparing the generator for startup.
A professional crew also pays attention to appearance. Straight conduit, clean cable routing, properly supported gas pipe, neat wall penetrations, and sealed openings all matter. Homeowners see the finished product every day, so the installation should look like it belongs on the property.
The automatic transfer switch is one of the most important parts of the system. When utility power fails, the transfer switch is what safely transfers the home from grid power to generator power. When utility power returns, it transfers the home back.
The switch must be installed correctly and matched to the home’s electrical service and generator design. This is not a part you want guessed or improvised.
Depending on the setup, the transfer switch may be installed near the meter, near the main panel, or in another suitable location. The best location depends on the home’s layout, the type of service, and the installation design.
During this stage, the crew may need to shut off power for a period of time. They will make the required connections, verify wiring, and prepare the system for inspection and testing.
From a homeowner’s point of view, this is often the least visible but most important part of the job. The generator outside gets the attention, but the transfer switch is what makes automatic standby power safe and practical.
A standby generator needs a reliable fuel supply. Most residential units in Ontario use natural gas or propane.
Natural gas is convenient because it is supplied by the utility and does not require a storage tank on the property. However, the existing gas meter and piping must be able to support the generator along with the home’s other gas appliances. If the meter or piping is undersized, the generator may not receive enough fuel under load.
Propane is common in rural areas, cottages, and homes without natural gas service. It can be a very good option, but tank sizing matters. A generator running during a long outage can use a significant amount of propane, especially in cold weather and under heavy load. The propane supplier should size the tank and regulators properly for the generator and expected use.
The fuel connection stage usually includes running pipe to the generator, installing shutoff valves as required, checking pressure, and testing for leaks. This work must be done carefully. Poor fuel supply can cause hard starting, poor performance, shutdowns, or service issues.
A good installer does not just connect the pipe. They make sure the generator can actually get the fuel it needs when it is carrying the home.
Once the generator, transfer switch, electrical wiring, and fuel connection are complete, the system needs to be tested.
Startup is not just turning the generator on and walking away. The technician needs to check that the unit starts properly, runs smoothly, senses utility power correctly, transfers power correctly, and returns to standby mode after utility power is restored.
A typical commissioning process may include:
Checking oil and basic unit condition
Connecting and testing the battery
Verifying fuel supply
Starting the generator
Checking voltage and frequency
Testing the transfer switch operation
Simulating a utility outage
Confirming selected loads or whole-home backup operation
Checking for error codes or warning lights
Setting the exercise schedule
Registering or documenting the installation
Explaining operation to the homeowner
This is the moment when the homeowner sees the system work. The power is interrupted, the generator starts, the transfer switch operates, and the backed-up circuits or home loads come online.
A proper test gives everyone confidence. It also gives the homeowner a chance to ask questions while the technician is still there.
The handover is where the technician explains the system in a simple way.
Homeowners do not need to become generator mechanics, but they should understand the basics:
What the generator does during an outage
How long it takes to start
What the transfer switch does
What the indicator lights or controller screen mean
What to do if there is a fault
Where the shutoff valves or breakers are
How often the generator exercises
How maintenance works
Who to call for service
The homeowner should also know that a standby generator is not maintenance-free. Like a car engine, it has oil, filters, spark plugs, battery, belts or service parts depending on model, and operating conditions that should be checked regularly.
The generator may sit quietly for most of the year, but when a storm hits, it needs to perform. Maintenance is what keeps it ready.
After installation, the biggest mistake a homeowner can make is forgetting about the generator until the next outage.
A home standby generator should be serviced regularly. At minimum, the owner should follow the manufacturer’s maintenance schedule. In Ontario, many homeowners prefer an annual maintenance plan because the climate is hard on outdoor equipment. Snow, ice, rain, wind, leaves, insects, rodents, and temperature swings can all affect a generator over time.
Regular maintenance may include:
Oil and filter changes
Air filter inspection or replacement
Spark plug inspection or replacement
Battery testing
Checking charger operation
Inspecting wiring and connections
Checking for leaks
Cleaning debris around the unit
Testing operation
Reviewing fault history
Confirming the exercise cycle
Maintenance is not just about extending the life of the generator. It is about reliability. A generator that has not been serviced may still look fine from the outside, but the battery could be weak, the oil could be old, the air intake could be blocked, or a small issue could be waiting to become a bigger one during an outage.
If you are investing in backup power, maintenance should be part of the plan from day one.
Even with a good quote and site visit, there are a few things that can surprise homeowners.
One common issue is gas capacity. A homeowner may already have natural gas, but that does not automatically mean the existing meter and piping can support a standby generator. The home may have a furnace, water heater, pool heater, fireplace, range, BBQ line, or other gas appliances. The generator adds another large load.
Another common issue is distance. If the generator has to be placed far from the gas meter or electrical panel, the installation may require more labour and material. Longer runs are not impossible, but they affect the installation scope.
Finished basements can also complicate routing. Running cable through an open basement is different from running it through finished drywall, ceilings, or tight mechanical spaces.
Clearance issues are also common. Homeowners may want the generator hidden in a certain spot, but windows, doors, vents, fences, property lines, decks, shrubs, or walkways may make that location unsuitable.
This is why the best time to solve these issues is before installation day, not during it.
The timeline depends on the home, the equipment, and the complexity of the installation. A straightforward residential installation may be completed relatively quickly once equipment, scheduling, and permits are in place. More complicated jobs can take longer, especially if they involve long gas runs, trenching, panel upgrades, meter upgrades, difficult routing, or coordination with other parties.
Homeowners should separate the installation day from the full project timeline. The physical installation may be one part of the process, but the full timeline can also include consultation, quote approval, equipment availability, permit coordination, scheduling, inspection, and utility or fuel supplier coordination.
A good contractor should give you a realistic timeline and explain what could affect it.
Before choosing a company for home standby generator installation, homeowners should ask practical questions.
Are you a Licensed Electrical Contractor in Ontario?
Who handles the electrical notification and inspection?
Who performs the gas or propane work?
Is the generator, transfer switch, battery, pad, wiring, and startup included?
Is there a limit on included gas pipe or cable distance?
What happens if the gas meter needs an upgrade?
Will the system be tested before handover?
Do you offer maintenance after installation?
Will you explain how the generator works?
Do you service the brand you install?
These questions help reveal whether the quote is truly complete and whether the company is qualified to handle the full system.
A standby generator is a long-term investment. The company installing it should be able to support it long after the sale.
A properly installed home standby generator gives you more than backup electricity. It gives you confidence. You know your furnace, sump pump, fridge, freezer, lights, internet, and essential home systems have protection when the grid goes down.
But the quality of that protection depends on the installation.
The best installations are not rushed. They are planned. The contractor looks at the home, listens to the homeowner, sizes the system properly, chooses the right transfer switch, confirms the fuel supply, follows Ontario requirements, installs the equipment neatly, tests the system, and explains everything before leaving.
That is what homeowners should expect.
At Generator Experts, we believe backup power should be done properly from the beginning. Whether you are looking for a whole-home Generac generator, an essential-load backup system, or guidance on the right setup for your property, our team can walk you through the process and provide a clear recommendation based on your home.
If you are considering a home standby generator installation in Ontario, book a free in-home or virtual consultation with Generator Experts. We will review your home, explain your options, and help you choose a backup power system that is safe, reliable, and built for the way you actually live.

Why Ontario homeowners with dogs, cats, aquariums, or small animals should think about automatic backup power Most people think about power outages in terms of

A practical guide for Ontario families caring for seniors, elderly parents, or vulnerable loved ones at home When people talk about standby generators, the conversation
Why automatic standby generators matter for travellers, snowbirds, cottage owners, and busy Ontario families A power outage is stressful enough when you are home. You
A member of our team will be in touch shortly to discuss how we can help to meet your needs.